Loading page
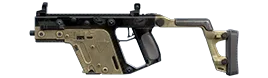 9mm
Submachine Gun (9mm)B-Tier (Viable)
Vector
Blistering close-range shredder with the fastest fire rate among standard world-spawn guns.
Competitive role: Close-Quarters Room Clearer
Armoury attributes
Normalised to 100- Power
- 31
- Rate
- 98
- Range
- 35
- Capacity
- 19
- Stability
- 90%
Key advantages
- Melts opponents in under 0.25 seconds in room rushes
- Accepts all attachments including tactical stock
Drawbacks
- Empty magazine in less than 1.5 seconds without extended mag
Attachment support
What this weapon accepts
Five in-game slots
MuzzleSupported
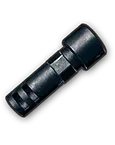
Compensator (SMG)
SMG Muzzles (Compensator, Flash Hider, Suppressor, Muzzle Brake)
ForegripSupported
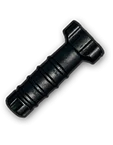
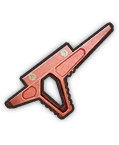
Vertical Foregrip or Half Grip
All Foregrips (Vertical, Half, Angled, Thumb, Laser)
MagazineSupported
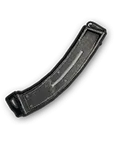
Extended Quickdraw Mag (SMG — Mandatory: expands capacity to 33 rds)
SMG Magazines (Extended, Quickdraw, Ext. Quickdraw)
StockSupported
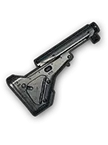
Tactical Stock (removes weapon sway and horizontal wobble)
Tactical Stock (M416, Vector, MP5K)
OpticSupported
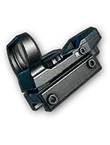
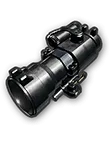
Red Dot Sight or 2x/3x Scope
Up to 6x Scope
Performance multipliers
Attachments that change the weapon
The picks that reduce distance damage falloff, settle camera shake, or expand ammo capacity.
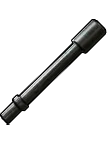
Muzzle slot
Barrel Extender (SMG)
+40% effective range
Compensates for firepower drop per distance and extends effective SMG range by +40%.
BGMI and PUBG MobileView specs
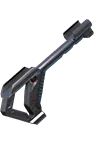
Foregrip slot
Ergonomic Grip
+25% ADS speed
Boosts ADS aim-down-sight speed by 25% and drastically reduces horizontal weapon sway.
BGMI and PUBG MobileView specs
Magazine slot
Extended Quickdraw Mag (SMG)
+33% ammo, fast reload
Increases magazine capacity by 33% and slashes tactical reload downtime by 40%.
BGMI and PUBG MobileView specs
Stock slot
Tactical Stock (AR, SMG)
20% recoil recovery
Cuts recoil recovery delay by 20% and eliminates pattern wobble and weapon kick.
BGMI and PUBG MobileView specs
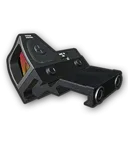
Secondary optic rail
Canted Sight
Instant dual-optic toggle
Enables instant 1-tap toggle between long-range scope and 1x Red Dot sight.
BGMI and PUBG MobileView specs
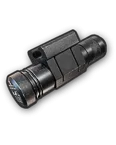
Foregrip slot
Laser Sight
-30% hip-fire spread
Reduces hip-fire bullet spread by 30% for pinpoint accuracy during non-ADS combat.
BGMI and PUBG MobileView specs
Recoil compensation
Best attachment loadouts
Optimized loadout based strictly on genuine weapon attachment compatibility in PUBG Mobile / BGMI. Equip Half Grip or Laser Sight for lateral control.
ForegripRecommended
Laser Sight
Eliminates horizontal wobble and accelerates reticle recovery.
Muzzle
Compensator (SMG)
Cuts recoil pattern and stabilizes bullet flight.
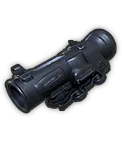
Scope
3x Scope (or 6x reduced to 3x)
Maximum peripheral vision and the cleanest reticle lines.
Magazine
Extended Quickdraw Mag (SMG — Mandatory: expands capacity to 33 rds)
Fastest reload downtime in intense teamfights.
Stock
Tactical Stock (removes weapon sway and horizontal wobble)
Rear stock stabilization for reduced weapon bounce.
Pro wrist tilt technique
Steadily angle device downward as bullet count climbs. Use short burst resets every 8-10 shots for pinpoint laser accuracy.
Recommended gyro sensitivity
Calibrated for 90Hz and 120Hz displays
- Red dot
- 340% - 390%
- 2x
- 300% - 350%
- 3x
- 230% - 270%
- 4x
- 170% - 210%
- 6x
- 110% - 135%
Range planning
Engagement range setups
Close range and room breach (0 to 25m)
MuzzleCompensator (SMG)
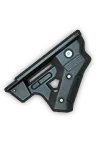
GripLaser Sight or Thumb Grip
SightRed Dot Sight
Maximizes hip-fire bullet grouping and scope-in time during aggressive building entries.
Mid to long range laser spray (50 to 200m)
MuzzleCompensator (SMG)
GripVertical Foregrip or Half Grip
Sight6x (pulled to 3x)
Focus on steady crosshair reset and controlled burst rhythms.
Damage profile
Time to kill by armour tier
Exact hit damage against each helmet and vest level.
| Hit location | No armour | Level 1 | Level 2 | Level 3 | Shots to kill, L2 / L3 |
|---|---|---|---|---|---|
| Headshot | 71 dmg | 50 dmg | 43 dmg | 32 dmg | 3 / 4 |
| Chest and torso | 31 dmg | 22 dmg | 19 dmg | 14 dmg | 6 / 8 |
| Limbs, arms and legs | 16 dmg | 16 dmg | 16 dmg | 16 dmg | 7 (ignores vest) |
Esports analysis
Pro insights and match rules
Tournament Meta GuideVerified Esports Protocol
Recoil Control & Crosshair Discipline
“When using Vector, never spray past 10 bullets continuously on moving targets. Re-centering your crosshair and re-scoping resets horizontal dispersion and ensures lethal accuracy.”
Pro Scrim AnalysisTier-1 Tactical Advice
Positioning & Engagement Distance
“Optimize your position to stay within this weapon's ideal range. Pair with a secondary weapon that compensates for its weak points.”
Competitive match execution rules
- 01Equip compatible attachments strictly according to verified slot allowances.
- 02Always maintain crouch position when spraying targets past 40 meters.
- 03Pre-aim angles at head level before peeking corners to maximize initial bullet damage.
Loadout pairings
Secondary weapon synergies
Combinations used in BMPS, BGIS and PMGC to cover this weapon's engagement ranges.
Keep reading